eComviser Seller App Onboarding: Seamlessly list and manage your products on ONDC Buyer Apps with eComviser Seller App.
The eComviser seller app facilitates the sellers to sell their products and manage orders, accounts, and payments with ease.
Listing products on ONDC will help sellers expand their business reach and boost sales.
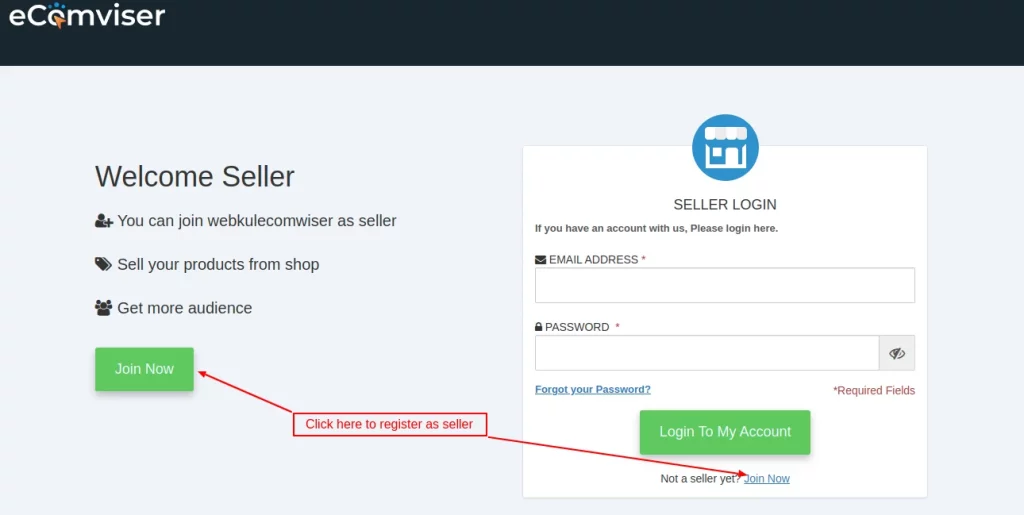
Seller Registration
For creating an account, the seller needs to visit seller.ecomviser.com/
Click on “Join Now” button on seller login page.
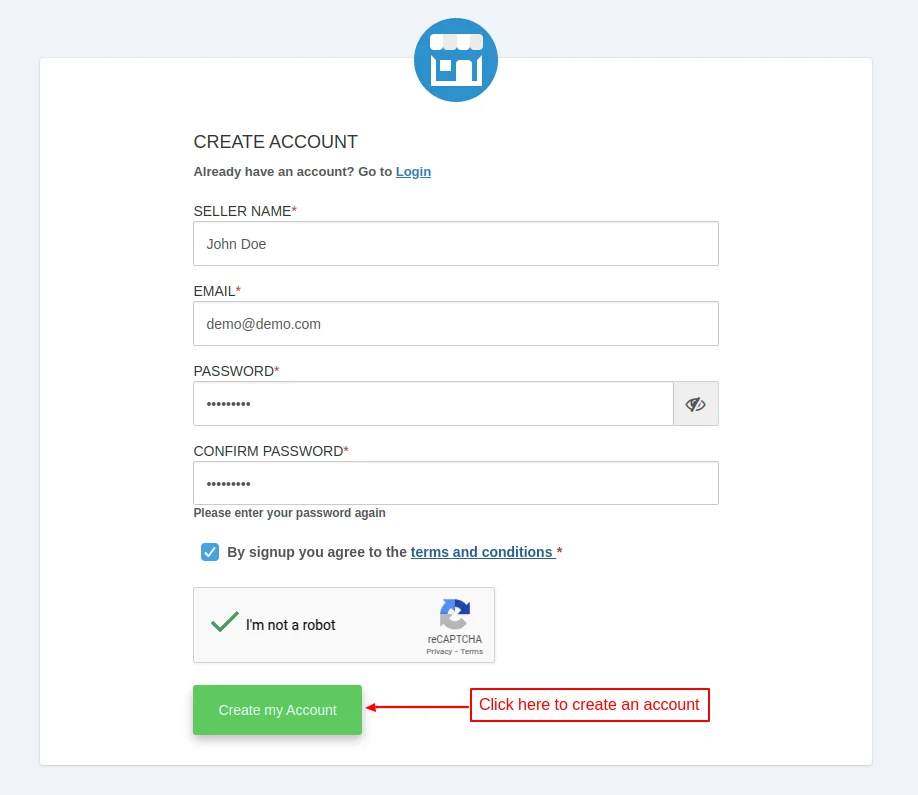
Then seller needs to fill the required details and create their account.
Seller Onboarding Process
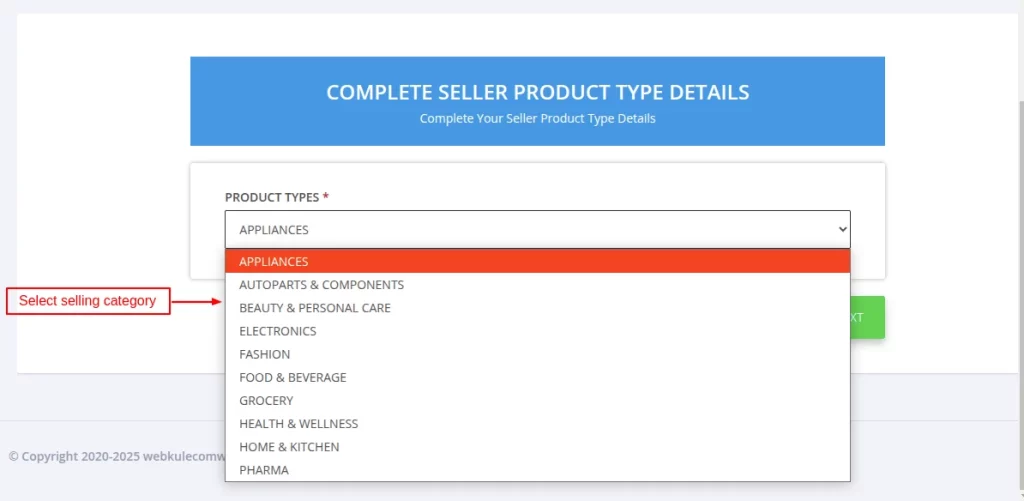
After creating an account, the seller needs to complete the onboarding process.
Select Product Types
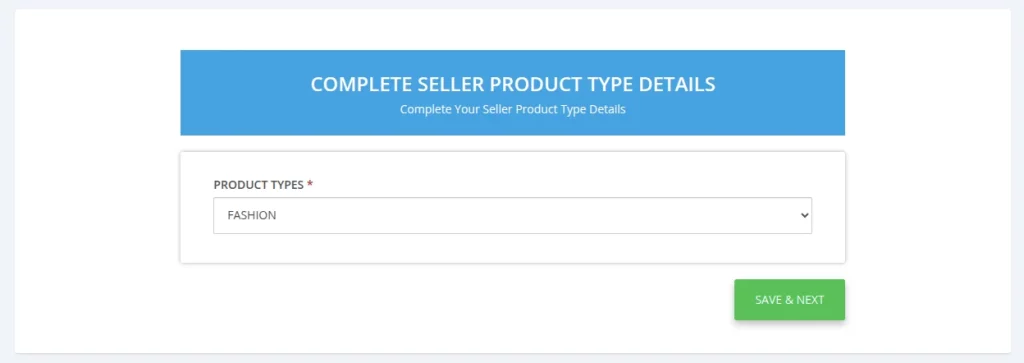
First of all, the seller needs to select selling category in product type from the dropdown list and click on ‘save & next button.
Add Primary Location
After selecting the product type, the seller needs to add the shop location details.
Details such as city, country, state, and zipcode gets automatically filled once the seller enters the address in the address field.
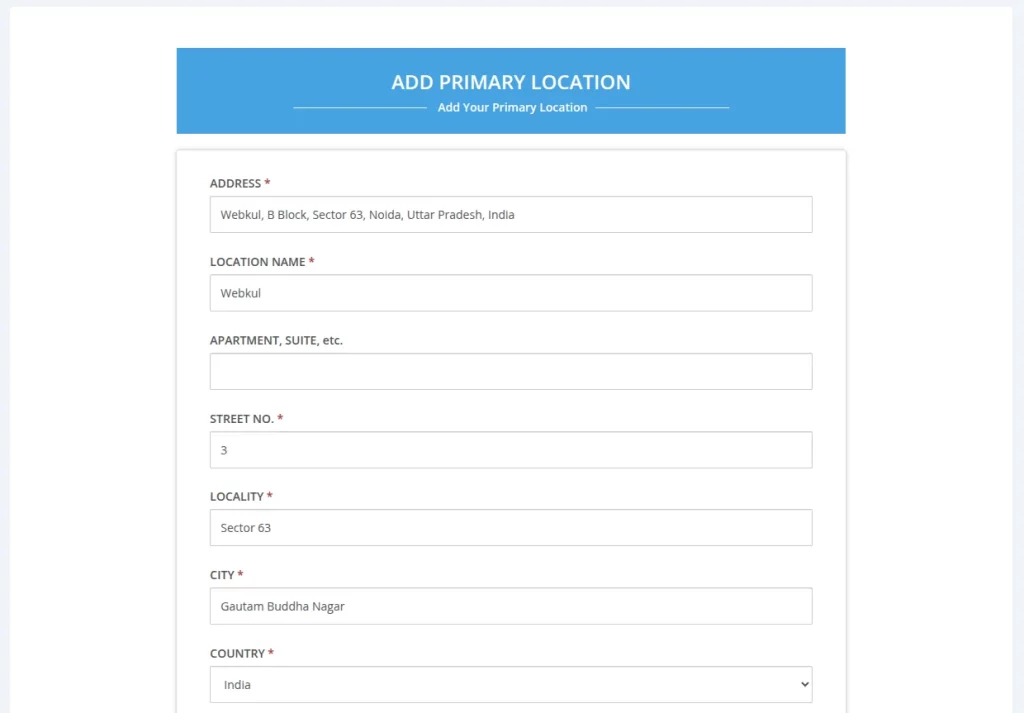
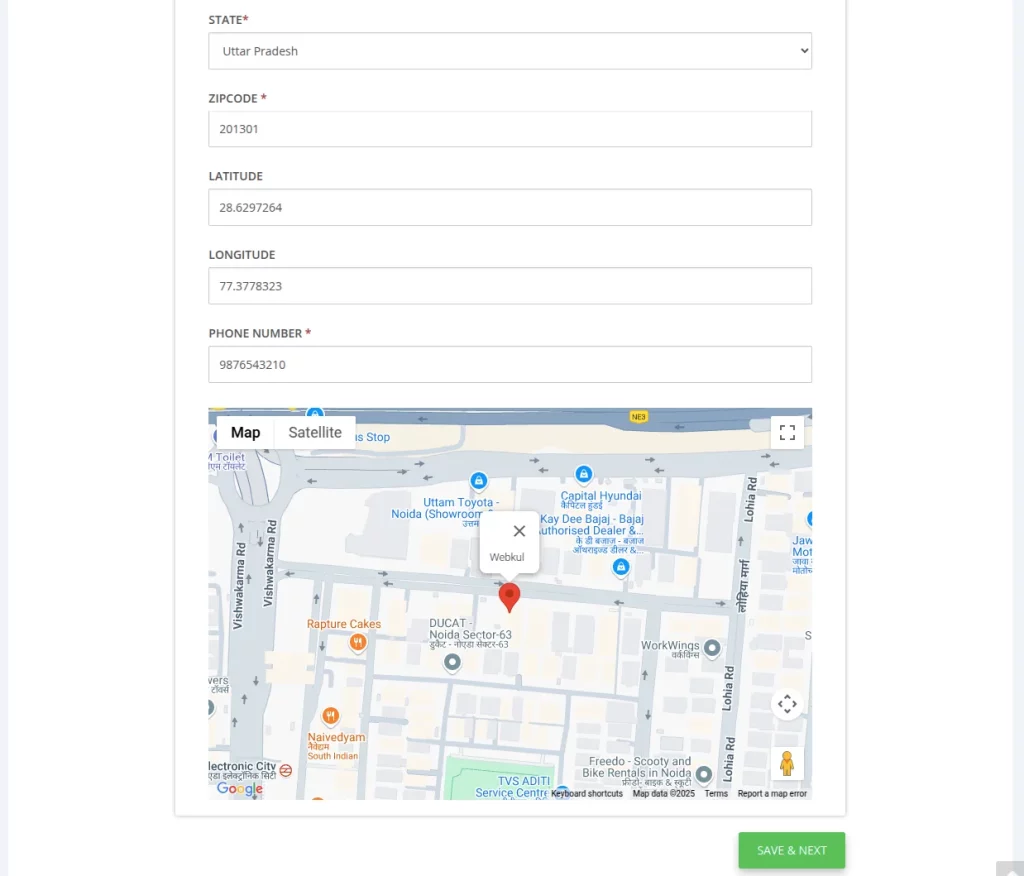
After entering address details, click on ‘save & next’ button.
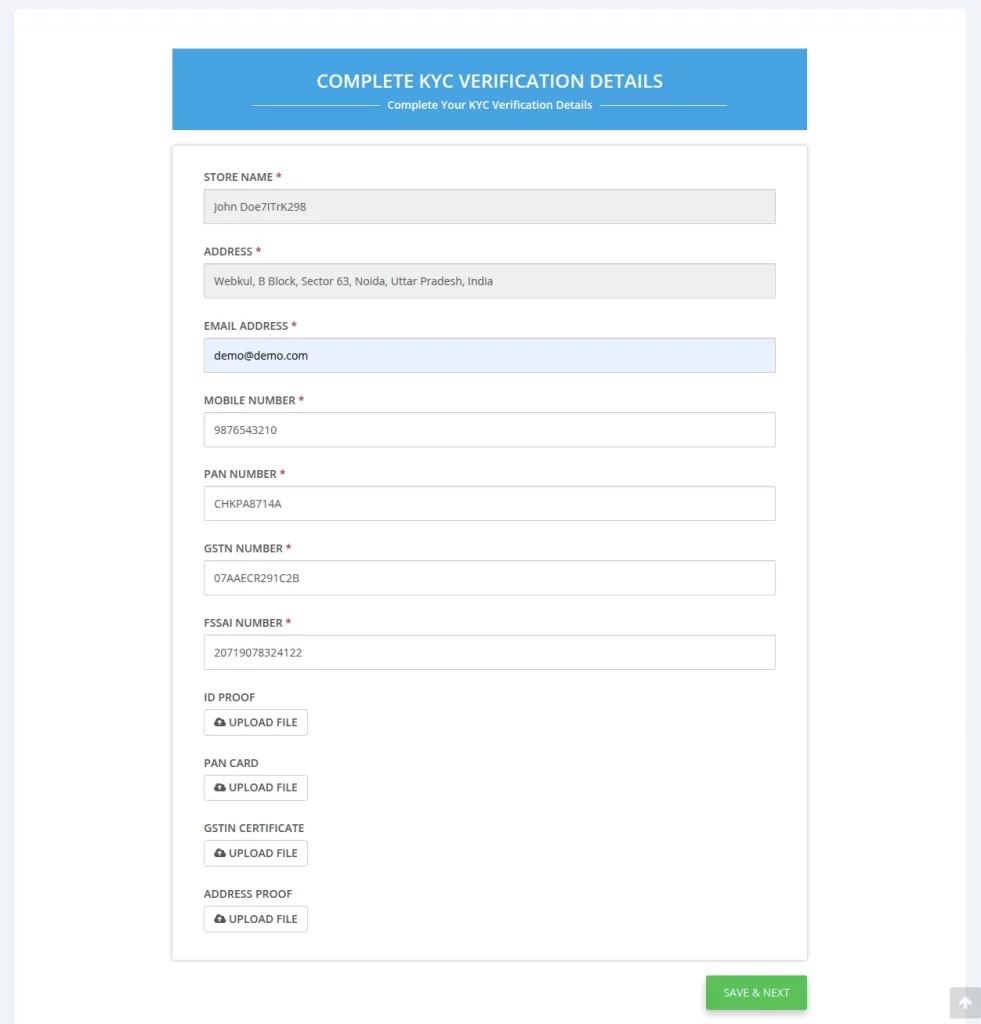
KYC Verification
After saving the address details, the seller now has to complete KYC verification details.
Based on the information provided previously, the store name, address, and mobile number will be automatically filled.
The seller needs to provide PAN, GSTN, and FSSAI number.
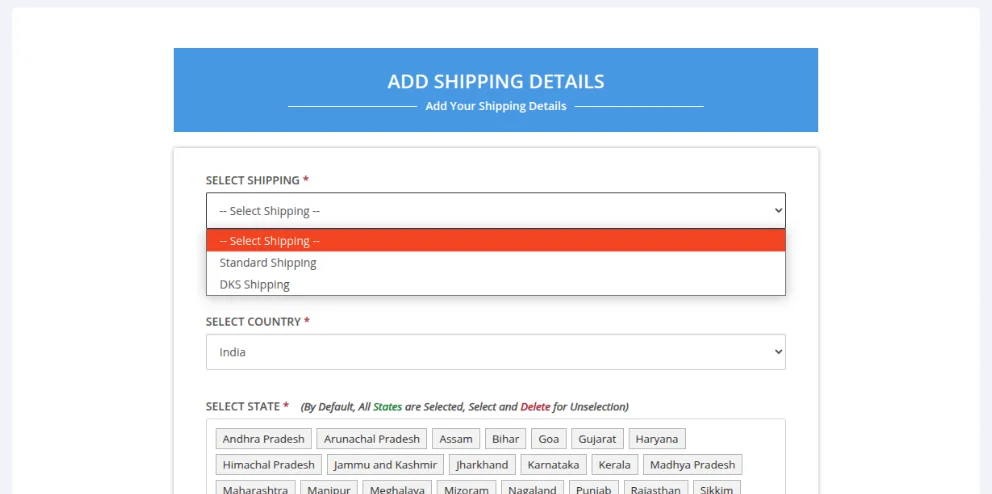
Add Shipping Details
On the add shipping details page, the seller can:
- Select shipping method that will be used for product delivery.
- Choose shipping range type as price or weight.
- Country and states where he can deliver the products.
- Set the shipping amount.
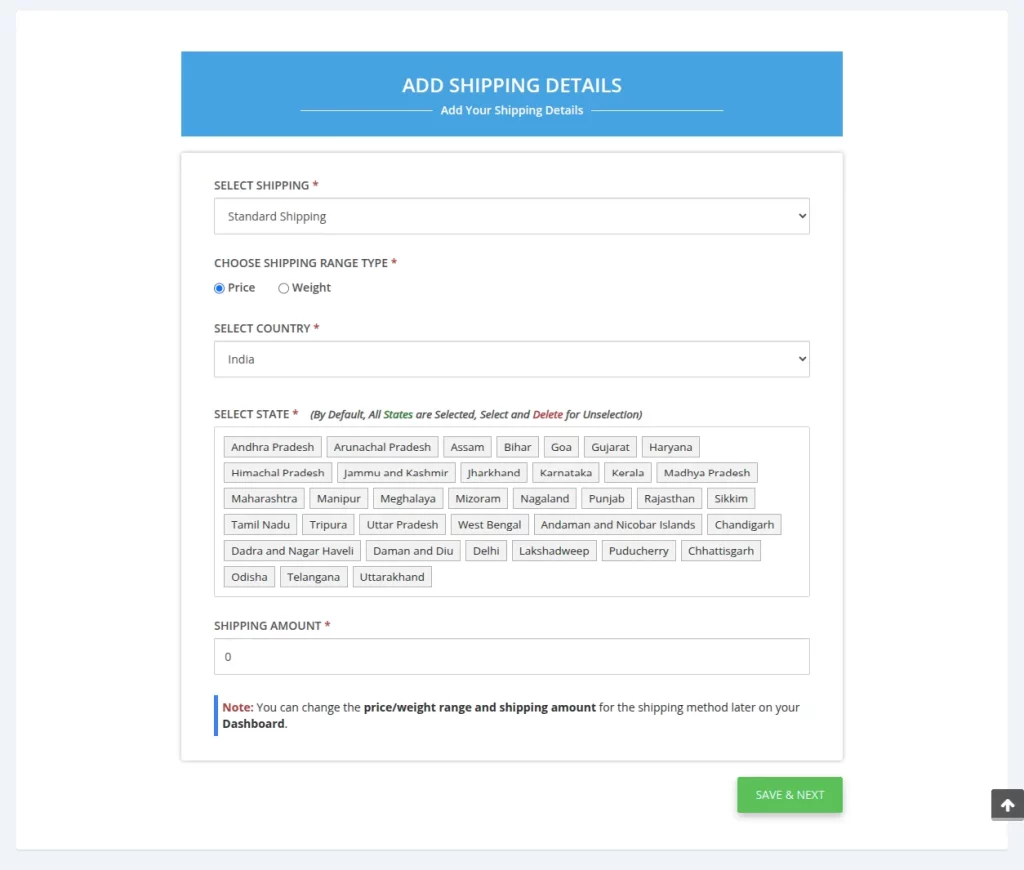
If the sellers can deliver products within 1 – 2 days, then they can select standard shipping.
And, if the sellers can deliver products within hours, then they can choose DKS shipping.
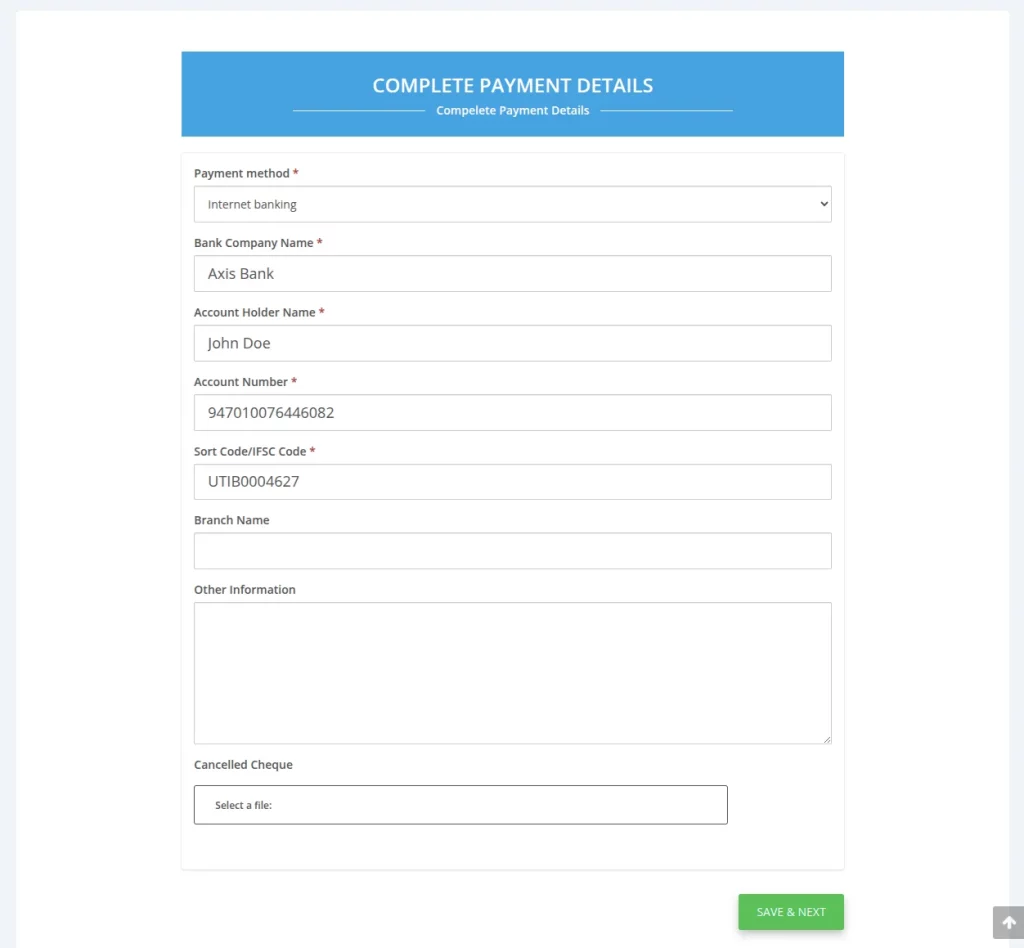
Add Payment Details
After adding the shipping details, the seller needs to complete the payment details.
Complete Hyperlocal Details
After adding the payment details, the seller can now complete hyperlocal details.
If the seller delivers within a certain distance, lets say 5 km, he can enable hyperlocal.
The seller can specify maximum distance upto which he can deliver products.
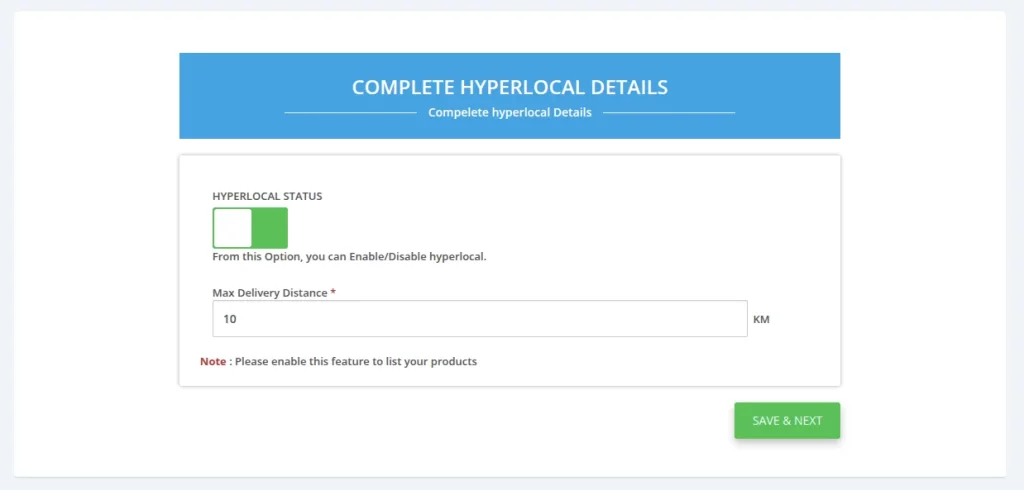
If the seller delivers PAN India, he can keep hyperlocal as disabled.

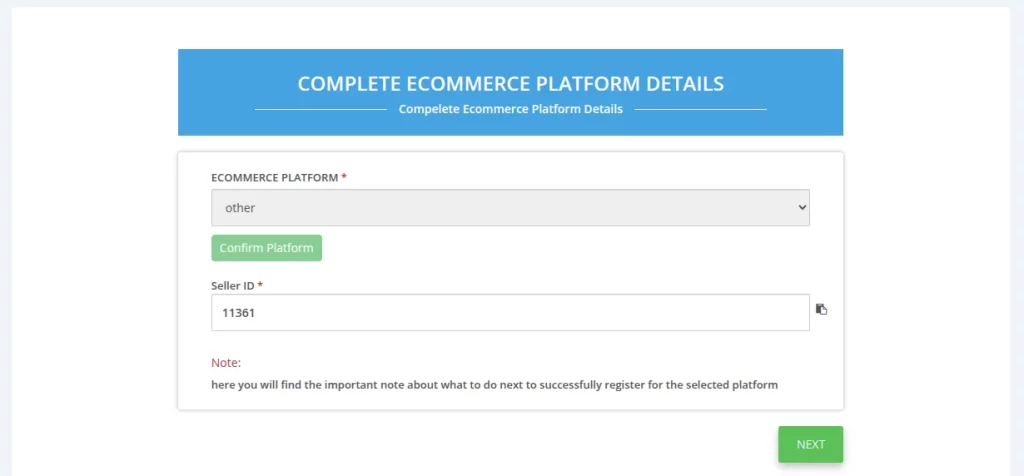
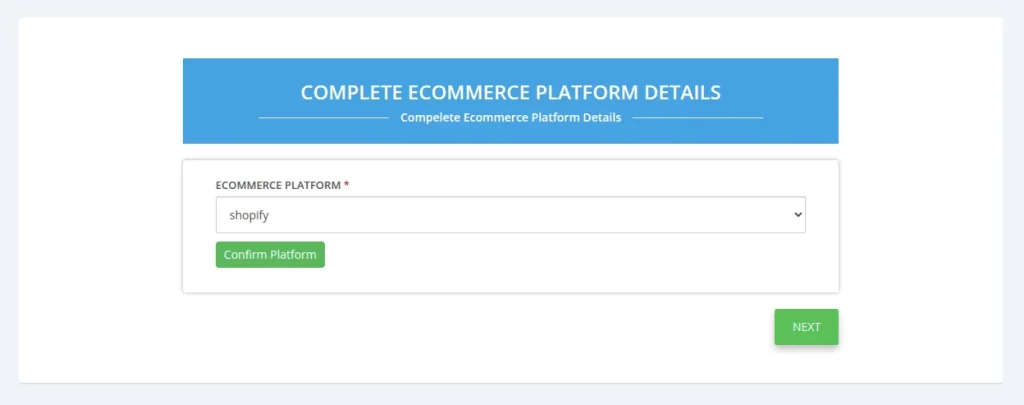
Complete Ecommerce Platform Details
The seller needs to select the ecommerce platform to proceed for the onboarding process.

If you are a new seller, then select ‘other’ in the dropdown list and click on ‘confirm platform’ button.
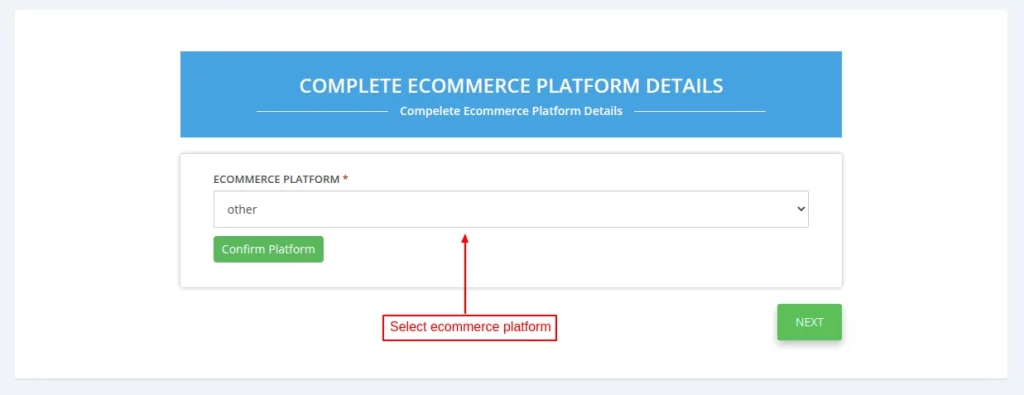
On clicking the button, a popup appears on the page asking for the confirmation.
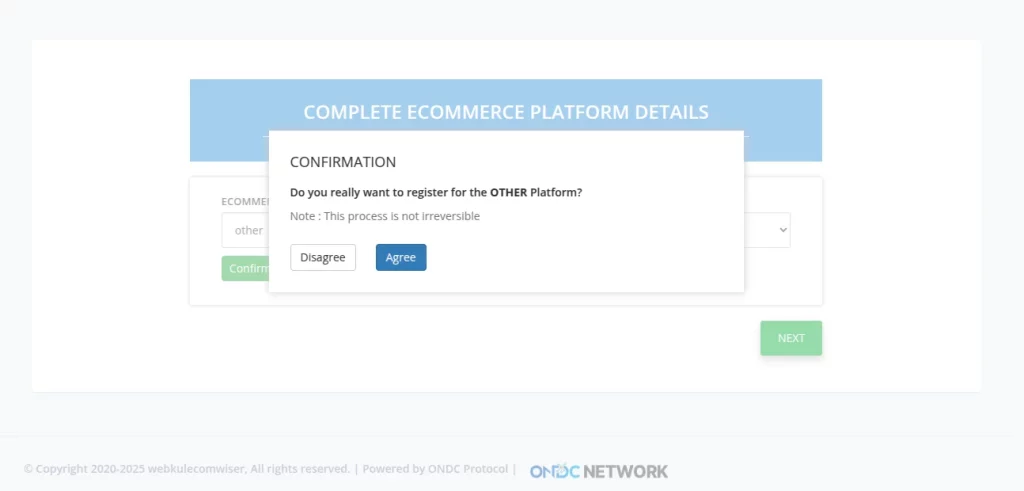
On clicking the agree button, Seller ID gets generated.
If you are selling on any platform (Shopify, Bagisto, Odoo), choose the platform and configure accordingly.
Complete Time Slot Details
Now, the seller has to set the opening and closing time of the shop.
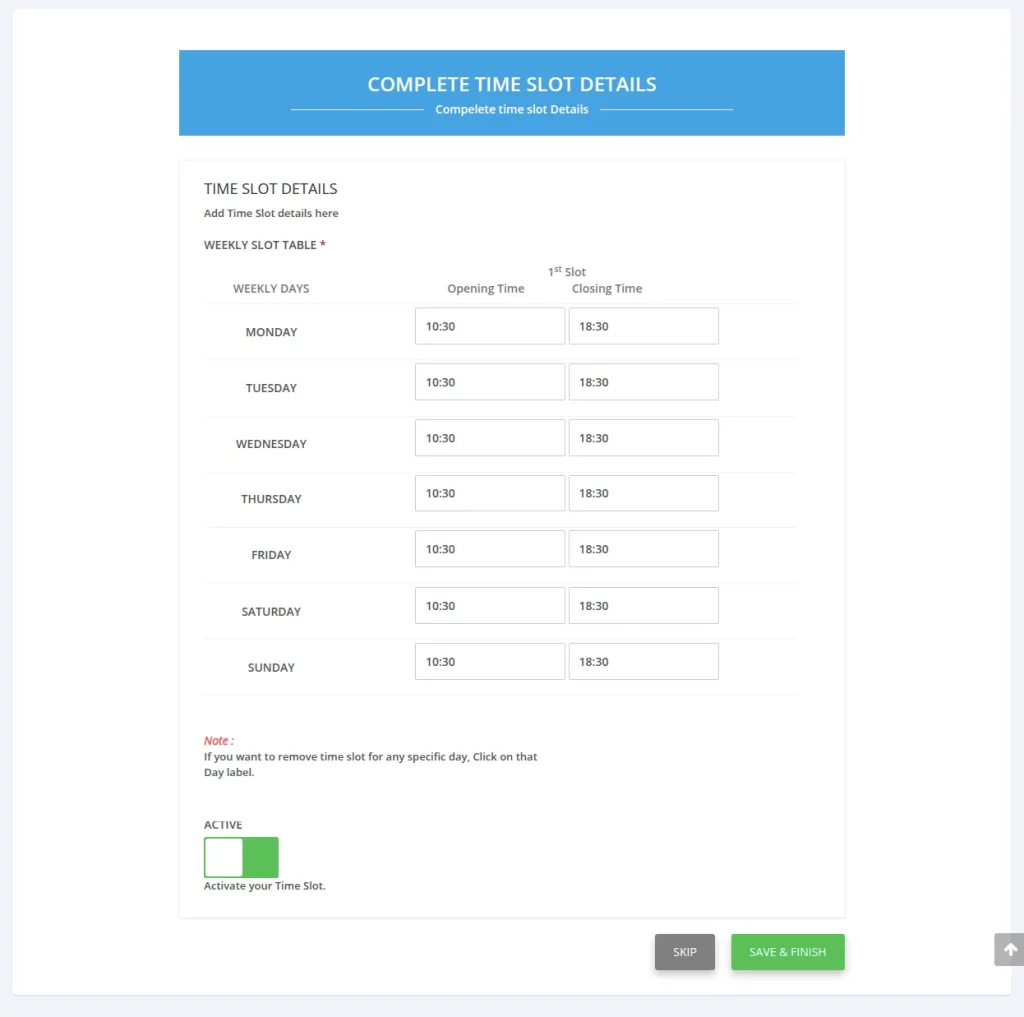
After setting the time slots, click on ‘save & finish’ button.
On clicking the button, the seller gets redirected to dashboard.
Seller Dashboard
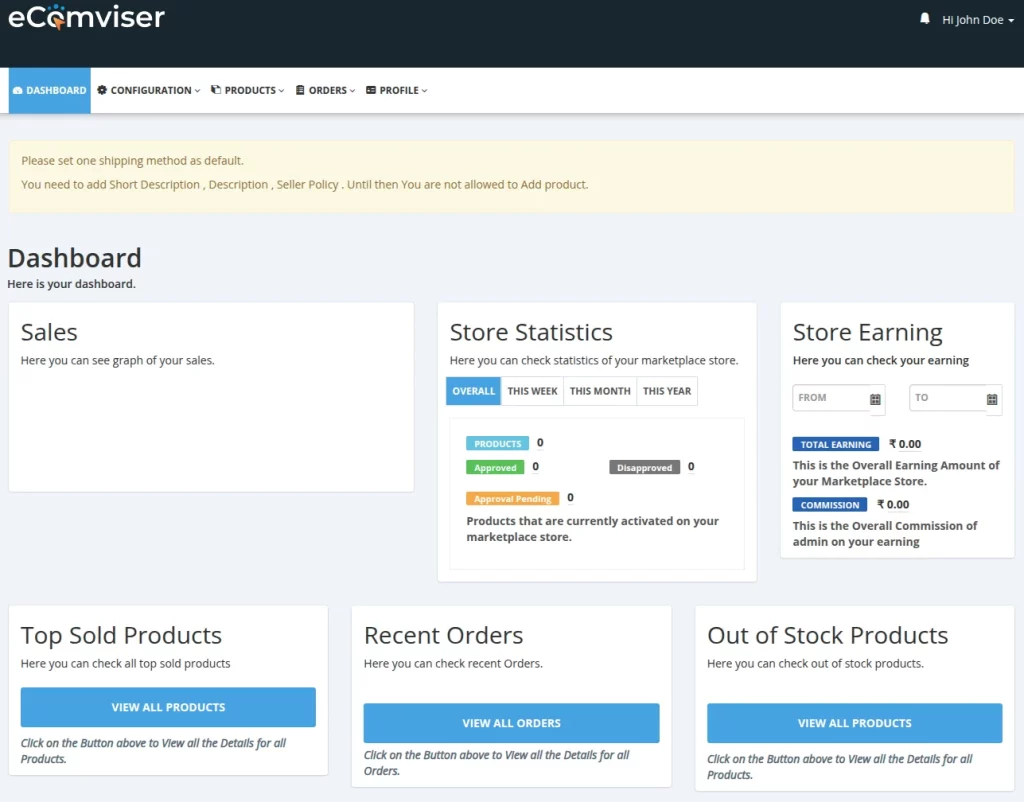
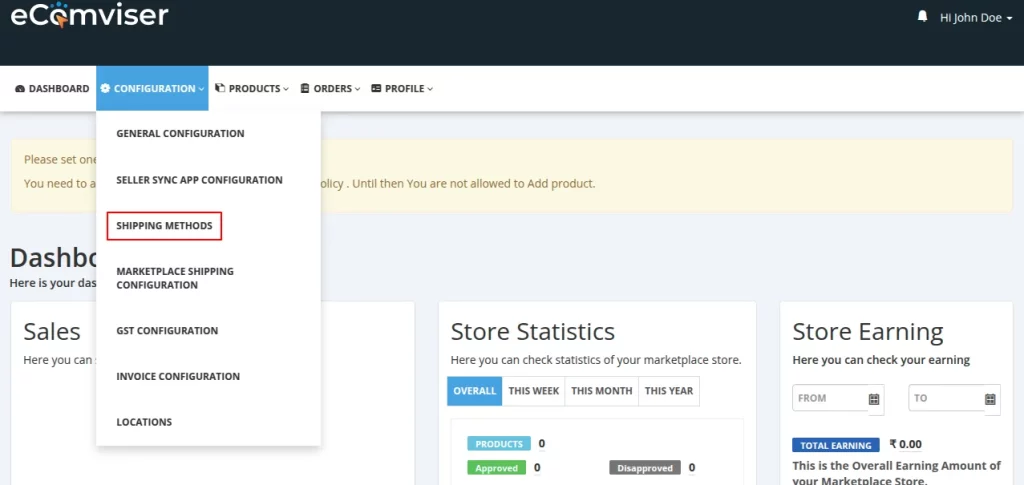
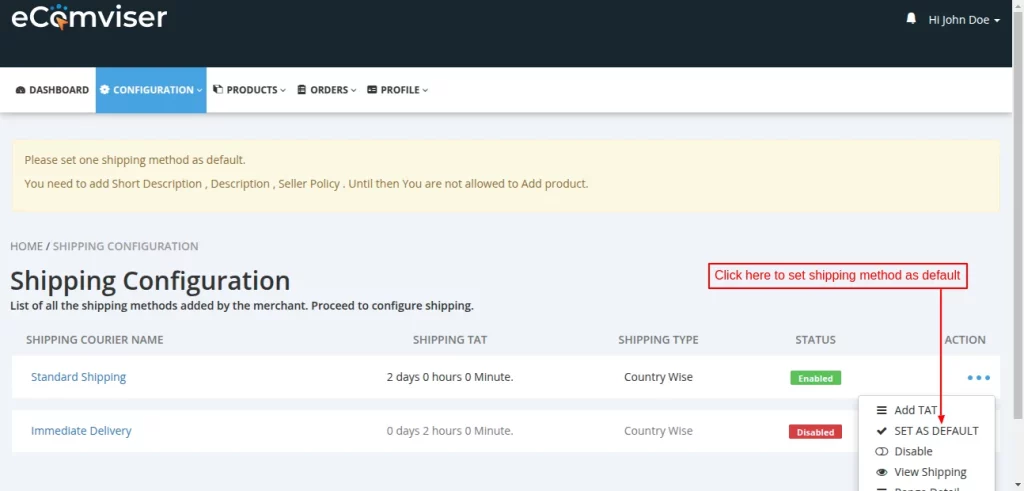
First of all, the seller needs to set one shipping method as default.
Go to Configuration -> Shipping Methods.
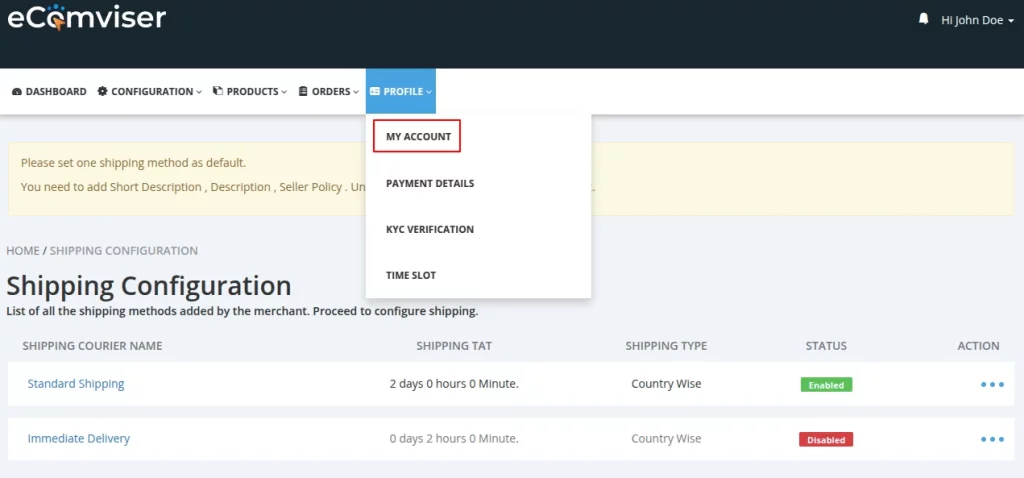
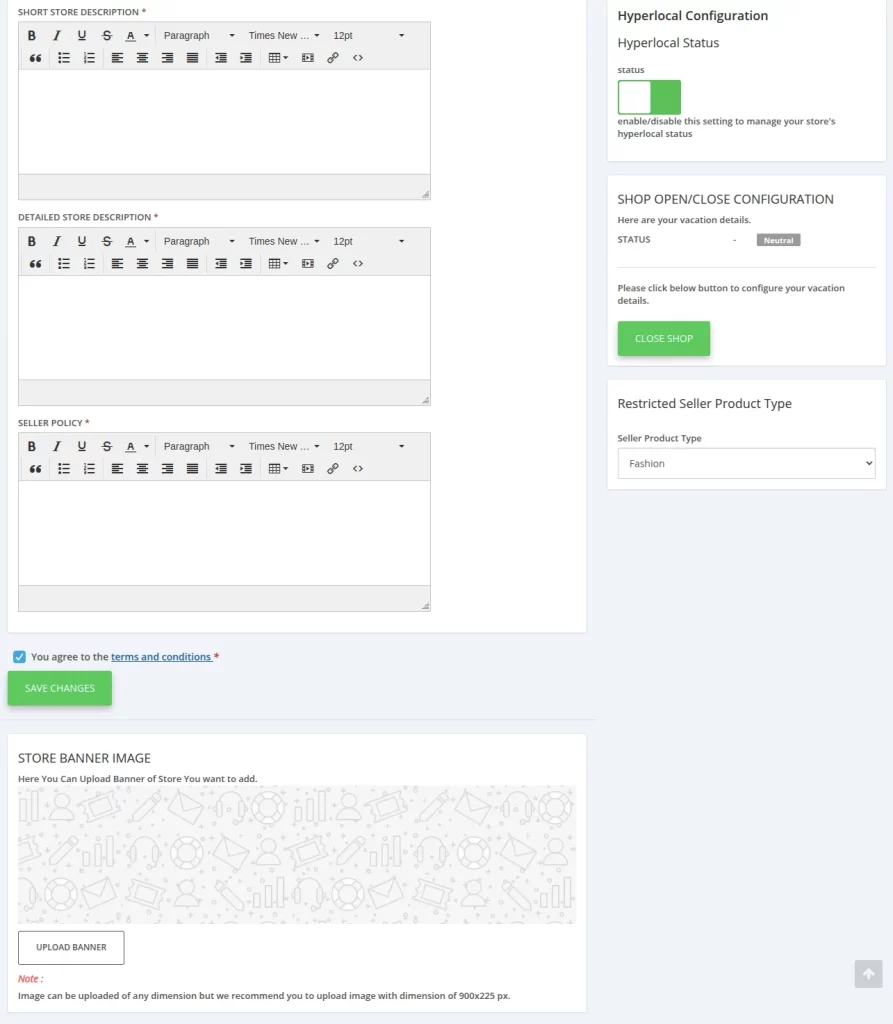
For adding the products, the seller has to add short description , description , and seller policy in the account.
Go to Profile -> My Account.
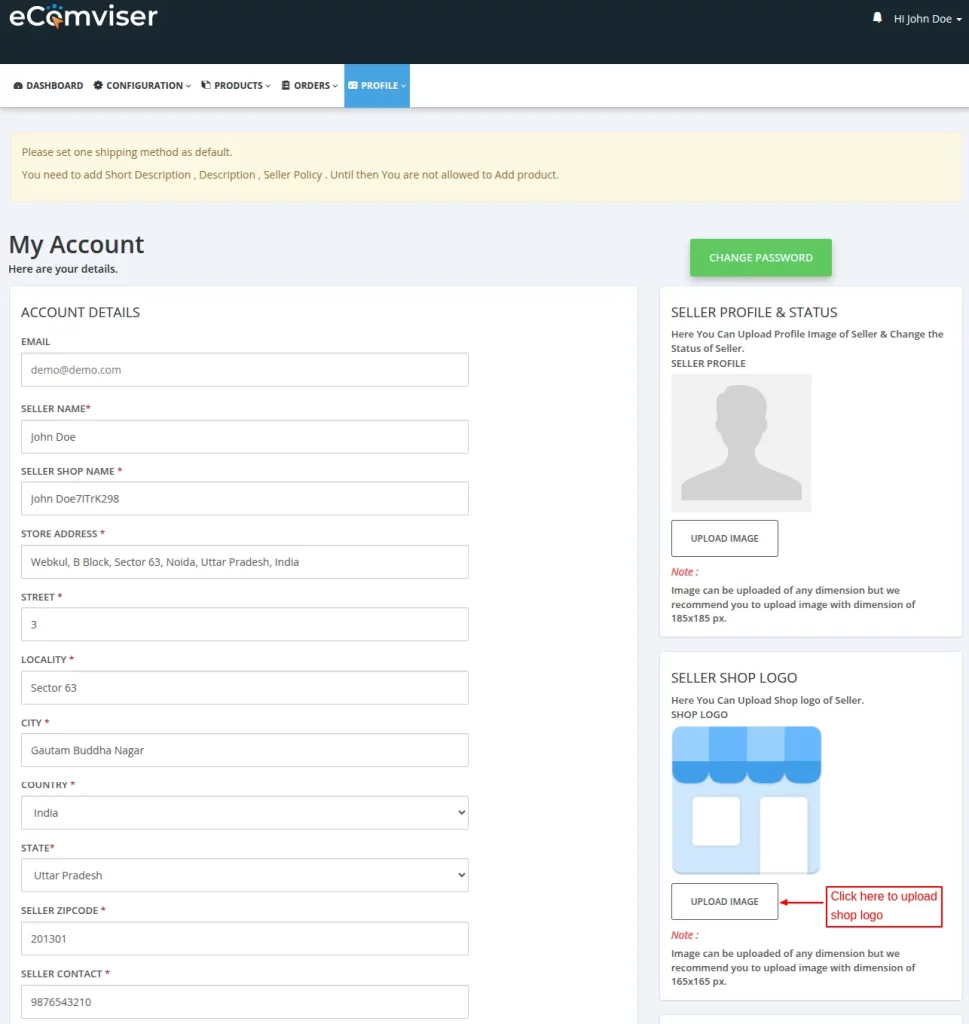
Once the seller has added the details in my account, he can start adding the products.
Support
For any kind of technical assistance or query, please raise a ticket at http://webkul.uvdesk.com or send us a mail at [email protected]

Make A Comment